Featured Post

My Expedition Vehicle & Trailer

Sunday, February 16, 2014

Majestic Mines of The Mojave Desert

 This adventure is a follow up to my last trip to this area and I invited a few friends to help me safely explore some truly majestic mines. Let me state right here: Do not ask me for the names or locations of these mines. The information is out there but if you have to search for it and then drive hundreds of miles and overcome difficult hikes you too will strive to protect these vanishing treasures. The vandalism we witnessed is sickening. This is a museum without display cases or barriers so please help to preserve it.


The desert is dangerous for the unprepared. The steep and unrelenting terrain can quickly injure or kill you. Its remoteness demands that you be self-reliant. Even if you could dial 911 on your cell only a helicopter might save you but is there one that can be dispatched in time to save you?


I know that some of you reading this have been to these locations and I applaud your achievement. To those of you that have yet to go, perform your research! The history is amazing. The struggles, abysmal failures and triumphs of the men and women who first came here are to be appreciated and preserved.

We spent three days for this adventure and I still feel as if we barely touched a small portion of what is to be discovered. Along with me were these hardy overland adventurers:


Alan

Joey
Peter
Mike


 Mall Ninja of the East Mojave Desert
(Jim's finger is OFF the trigger)

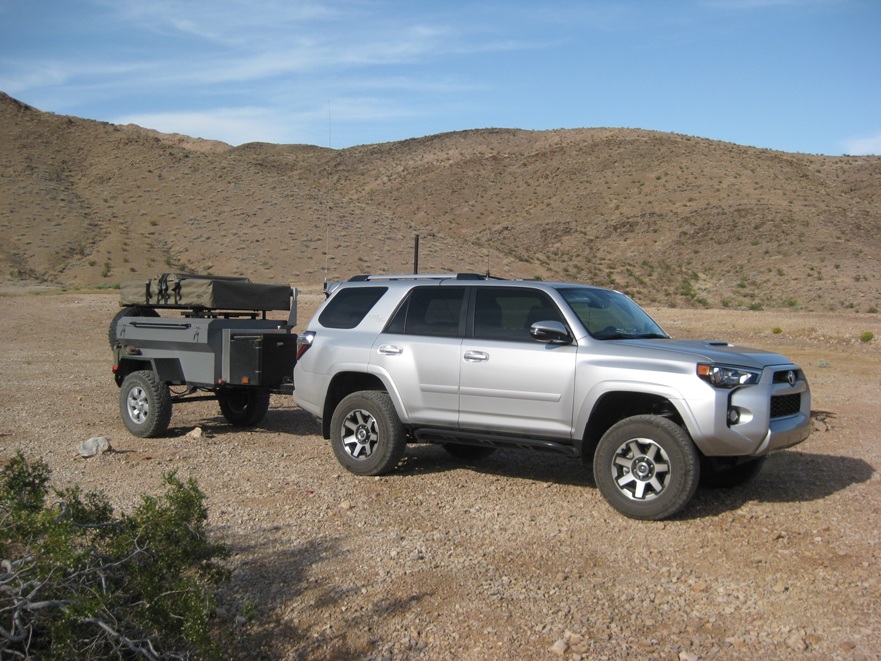
Of course I did not miss the opportunity to bring out my expedition trailer!


Camp Teotwaki Aerial Shot

We traversed many miles of rocky and elevated trails as many mine adits are well off of the beaten path. A quality compass, old topo maps and a good GPS are invaluable.


We were amply rewarded for our efforts! At higher elevations spectacular structures and adits  patiently await cautious exploration.


photo by Alan


Photo by Alan


Sometimes the spirits of jealous miners stand a fierce guard over their gold and silver.....


D. McC. was here in 1923! Miners often used the soot from their carbide lamp's flame to write names, dates and ribald comments. (Photo by Peter)
 

Alan inspects a vertical shaft that was boarded over.
Photo by Joey

Route finding under cloudy desert skies. (Photo by Peter)

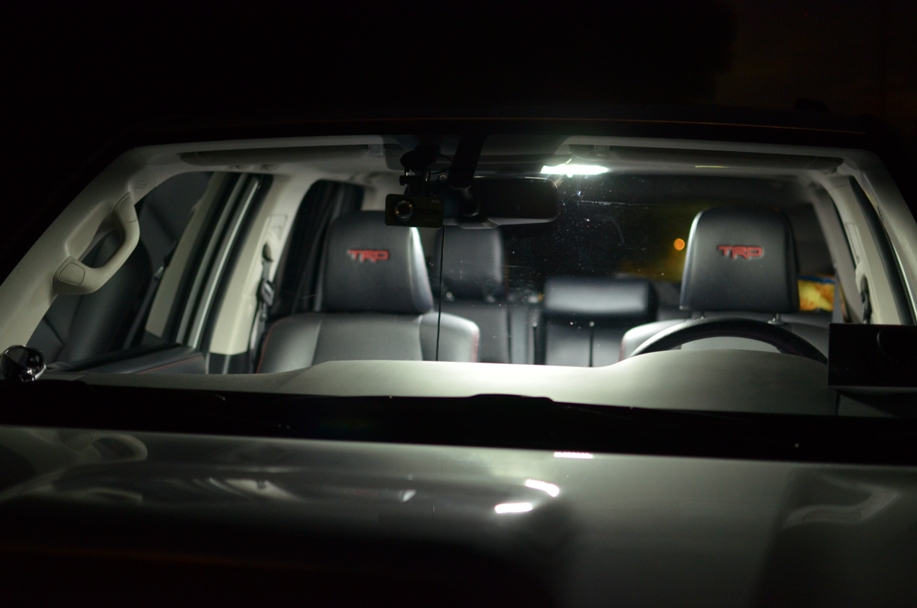
 Once back at camp Joey enjoyed Mike's well equipped all-frequencies communications station.

We all enjoyed Mike's very agile and swift drone which allowed us to easily inspect old burro paths and  mines before we tried clambering up to them.

photo by Joey

How to swat a pesky drone
Photo by Alan

We hugely enjoyed great meals of Mediterranean meat skewers, teriyaki chicken, stew and Apple pie.
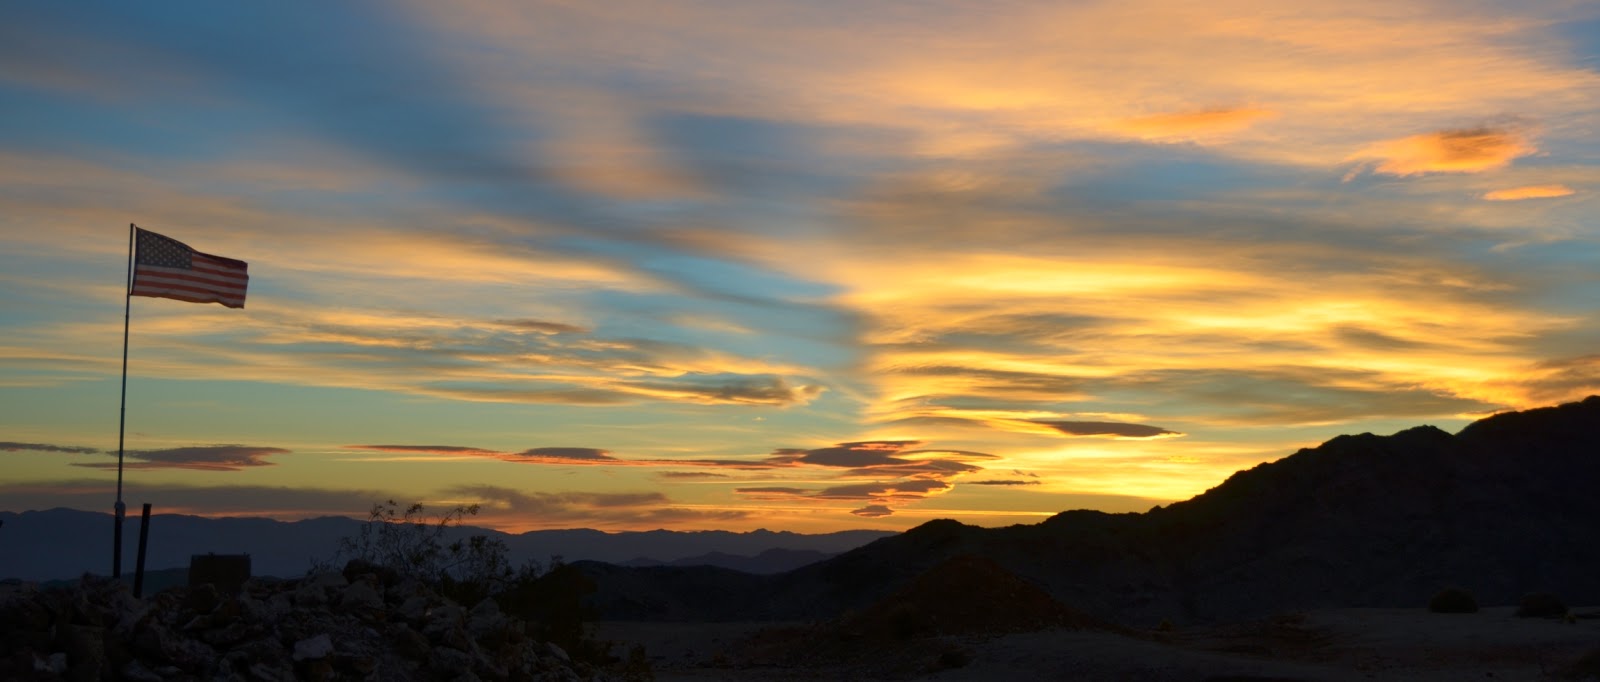
Spectacular sunsets at Camp Teotwaki were always far better than mere photographs can portray

My camp the next morning


Only three of us would go on the last day's hike. We packed up camp and said our goodbyes to the others. We planned to navigate faint desert jeep trails to a rugged and forbidding canyon to search for a mine that few have ventured to.


This location did not disappoint!

 The day was getting late and I was tired. I had run a marathon the weekend before and was still recovering. The steep descent went more quickly than anticipated. In large part it was due to Alan's keen eye that traced out an old miner's trail that helped us to avoid the scree covered slopes.
Photo by Alan

Upon my return to home I was able to research one location that we visited and match up this old photograph of a steam train's visit to the remote location. It explained the section of former railroad bed that we discovered near a mine's ore chute.


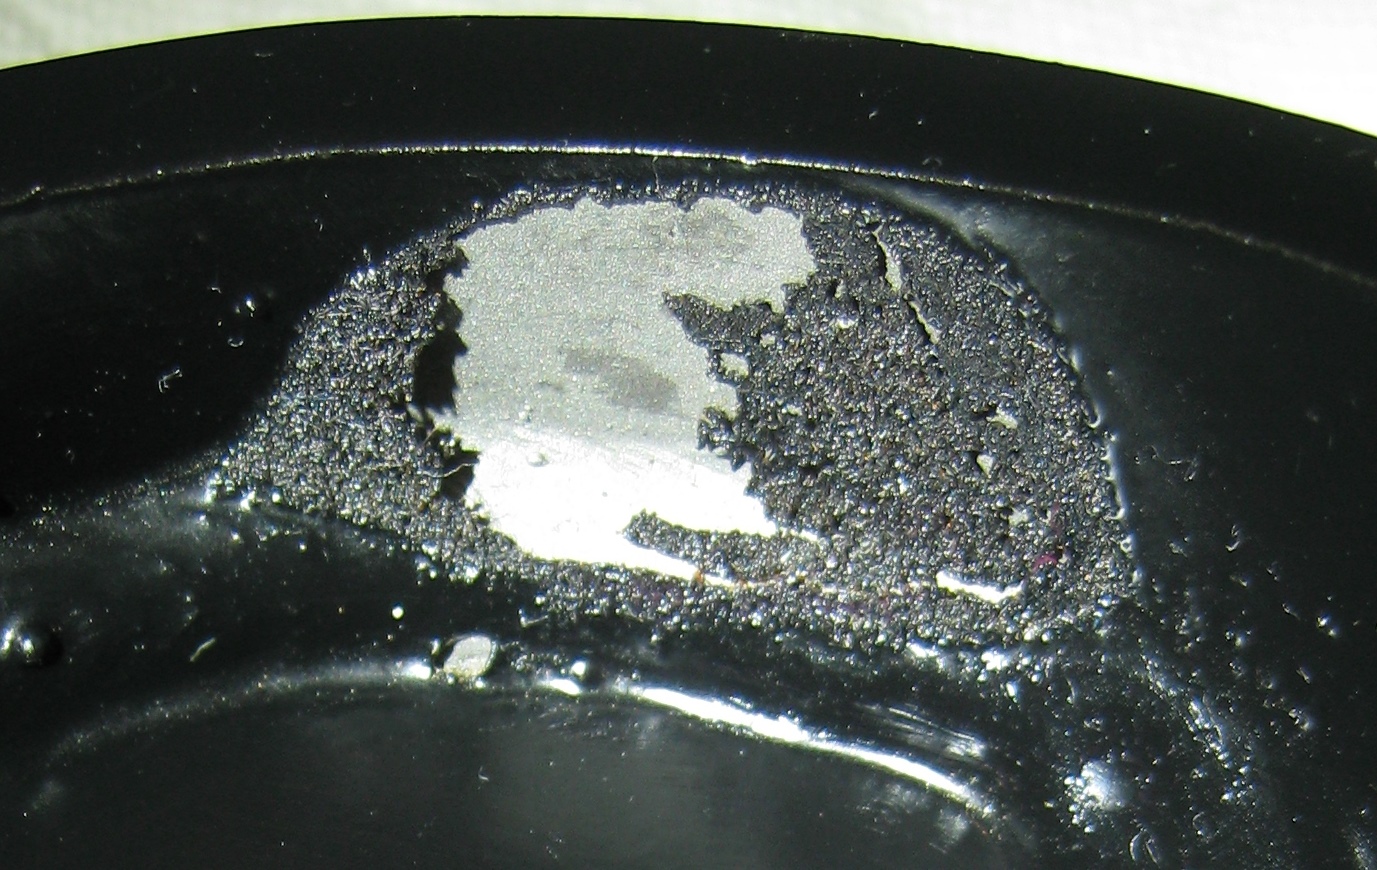
We also identified this old can with a small valve and spout as an old kerosene container from Standard Oil with a brand name of "Pearl Oil".


Thank you for joining us on this adventure! I'll be sure to give you a call on the next one.


Wednesday, February 12, 2014

My Expedition Vehicle & Trailer


I have received numerous inquiries about my truck and trailer, the gear choices and guiding philosophy. This write-up is an attempt to share a little of the story behind the modifications I have made and what additional equipment has been installed. It will be a work in progress so please check back for updates!

What I desire is a very reliable overland vehicle that can easily traverse rough roads or uneven terrain where a paved or graded dirt road did not exist. I can divide the design approach into these 5 categories:
  1. Exterior - cargo rack, skid plates, sliders, tires
  2. Interior - lighting, mats
  3. Systems - GPS, comms, air compressor, dual batteries, Engel Fridge, DC power outlets
  4. Suspension - coilovers, rear shocks & springs, Lower Control Arms (LCAs)
  5. Drivetrain -  Toyota - rear axle E-Locker, multi-terrain select, crawl control


A 2018 Toyota TRD Off Road Premium with a factory rear locker, crawl control and multi-terrain select features was my choice to replace my 2005 4Runner.

My plan was not to modify the vehicle in some way that would negate the OEM warranty or be so irreversible as to ruin the resale value.

Lots of upgrades were installed by me: sliders, better suspension, dual battery setup, beefier rear lower control arms and A-Arm skids.

I took off the suspension from the old 4Runner and sent it to the RadFlo factory for a rebuild with  new seals, springs and so on.


 Rear springs cleaned up and repainted.


I also cleaned and repainted the beefier square tubing rear lower control arms. The stock Toyota control arms are easily bent in rough terrain.

Suspension install -. The "old" front swaybar relocation brackets would not work on the new 4Runner so I ordered a new set. The block serves to move the swaybar a little forward so as not to contact the coilover.


The offset blocks for the swaybar have been installed and I now have the swaybar back into the 4Runner.


 Here is what it looks like with the OEM Bracket and swaybar reinstalled over the spacer blocks.

 After I received the rebuilt front coilovers they and the rear coil springs, rear shocks, bumpstop spacers and heavy duty lower control arms were installed in a day. 


I also installed my aftermarket end links for the rear swaybar. Here is the stock one in position. Note how the swaybar is pointing uphill when it should be closer to horizontal to perform correctly.

Here is a reconditioned aftermarket link next to a stock one. The extra length is to position the swaybar into correct alignment after the install of the taller rear springs.


After the suspension settled in I had a realignment performed on the 4Runner.


Lift installed!

 The Toyota running boards are nice for high heeled ladies to climb into the 4Runner but the boards will be damaged during any serious offroading. A more useful addition are "sliders" which are heavy wall steel tubes that are bolted directly to the frame. They not only protect the 4Runner's body but can support the weight of the vehicle as you literally slide on them across large rocks. The sliders also offer strong points to lift the vehicle with a Hi-Lift jack. I had saved the sliders from my 2005 4Runner and they needed cleaning, some modifications and paint.

The rock sliders from the old 4Runner needed a small modification so that they would fit well on the new  4Runner.

I spent time in the garage measuring and cutting then had a shop weld on a small 2" square plate over the opening.


Front of the sliders have been welded. They needed a bit more cleanup and lots of paint.


The sliders' four mounting U-bolts have been cleaned and repainted.


Sliders are clean and repainted, ready to bolt up!

A few late afternoon shots of the install.


Each of those round openings is a spot to place a HiLift Jack where it won't slip when lifting the truck.

A view down from the driver's side door.


I fabbed a swingaway front license plate holder that is down below the bumper. Keeps the LEOs happy and I avoided drilling holes in my nice front bumper.  Here is one of the spring loaded hinges I used. 


 The two of them apply opposing force so the "neutral" position is straight down but they allow the plate to give to any bushes or other objects that might have bent the license plate.

Pushed all the way back


Pushed all the way forward 


I came up with a simple way to mount my ScanGuage II in a spot that allows unobtrusive yet easy viewing. This entailed making a simple mounting bracket out of thin aluminum and also some of the time-honored Velcro strips to allow removal for cleaning or other issues.


The cable for the OBD-2 connection routes next to the steering column. If I can find a right angle adapter I may be able to use the ScanGuage's rear port and lessen how much the cable hangs out in the open.


Onboard air is great for airing tires back up! Lots of power is on tap with a direct battery connection and no chance of ever forgetting to pack your compressor. For the air compressor install above the driver's side fender well it was necessary to relocate a small electronics module as well as a small box that contains three relays.

The module was moved from the top of the fender well to an existing bracket for the braking system.

The relay box is normally fastened to the side of the fuse box and it has a series of channels that allow it to slide onto the fuse box's molded in bracket.

I made up a small plate out of aluminum and fashioned three "fingers" of aluminum that slide into the channels on the relay box. This new plate fastens to the wall of the engine bay above the fender.


This is the relay box fastened onto the new plate.

 Here is the compressor's bracket fastened to the base plate.

This view shows the dense foam vibration absorption layer between the metal plates.


How the compressor looked on the plate during a test fit.

Compressor is intalled! The pressure switch and outlet are screwed in too.


Next project was to install the Tekonsha Prodigy P2 brake controller for handling the trailer's electric brakes. Similar to the last 4Runner there is a good spot on the bottom left of the dash. Toyota has the truck pre-wired with a connector so as to make it an easy plug-n-play install. Most of my efforts centered around the mechanical installation which meant opening up the dash. Always hard to tear into a new car!


Here is the P2 installed.


Second battery bracket was installed in the engine bay, passenger side. 


The battery is actually an Odyssey PC1500 that was private labeled for Sears as a DieHard Platinum.  Almost 5 years old and seems to be doing well.

This battery will be used for the fridge and the two way radios. It is maintained by a CTEK 250SA Dual.


The D250SA is a fully automatic, 5 step charger that supplies up to 350 Watts of power to any 12V lead acid service battery from 40-300AH, including AGM. It has selectable charge voltages for AGM batteries and can use power through its dual input from alternator, solar panel and wind power. When the service battery is fully charged, the D250SA will automatically redirect maintenance charge power to the starter battery. The D250SA can maintain a stable output up to 20A to vehicles fitted with smart ECU controlled alternators and also has a temperature sensor for optimised charging, regardless of weather conditions.
  • 20A fully automatic temperature compensated charging for batteries from 40-300Ah while you’re on the move
  • Dual input (solar and alternator in parallel)
  • Battery separation replacing diodes and VSR relays
  • Solar panel regulator with Maximum Power Point Tracking (MPPT)
  • Selectable AGM option – 14.4V or 14.7V
  • Maximized charging for better battery life and performance
  • Temperature sensor to compensate for hot or cold conditions
  • Splash and dust proof (IP65)
I bought mine on eBay from HardPartsFast and received excellent service with the lowest price.

For running the fridge and radio I ran 2 cable pairs to the 4Runner's cargo area. What the area looked like before disassembly.

In order to route the wires I had to pull the interior panels off. The small metal box is the factory 117vac supply (inverter).

Bringing the power wires and radio cables out from behind the panel for connection to the modified AC Outlet Panel.

Here is the Toyota AC Power Outlet Panel modified for a LED readout DC Voltmeter, dual Anderson PowerPole outlet and high quality cig lighter socket. The meter pulls less than 0.009 Amps so I just leave it on all the time.

Radio is installed and plugged into the PowerPole outlet. I also modified the Engel Fridge power cord to use an Anderson PowerPole.


First time out with the new 4Runner and off road trailer in the Mojave Desert!


New tires! These are the Falken WildPeak AT3W replacing the stock Dunlop street tries. They are 265/70R17 and weigh only 7.5 pounds more per tire.


Here is a comparison shot which emphasizes the tread pattern the Falken offers for better offroading performance over a street tire. 


 The new tires have been performing very well


On the 2005 I had some Total Chaos skids for the lower front A-Arms. I repainted them and installed them on the 2018 4Runner

 Left

Right

I wanted to have good armor underneath the truck, similar if not better than my old 4Runner's steel engine skid. After looking at eight different vendors I settled on the products of RCI Metalworks. Their system of skids provide protection to the engine, transmission, transfer case and engine exhaust crossover pipe.


Crafted from 3/16" steel plate and powdercoated in black, the skids have a number of key features that were attractive to me.

Six bolts fastening the engine skid to the frame instead of four as implemented in other brands.  The center bolts feature a strong riser to mate the skid to the truck frame.

 Access to the oil filter without removing the skid. 


Reinforced transmission skid (the longest one of them all)
using lengthwise stiffeners to act as a backbone.

Protected bolt heads in the lowest areas where rocks will contact the skid

A strong crossmember to protect the transfer case and support the skid to prevent it from collapsing inward on large impacts.

The exhaust crossover pipe is no longer vulnerable to scraping and denting and just clears the skid plate; A close fit!

Once finished with installing the skids I added in RCI's filler plate to cover the gap between the bumper and the engine skid. Toyota's original piece was made of plastic but would no longer fit due to its peculiar shaping.


A new addition is now in the glove box!

This dual USB outlet is wired to the second battery and is always powered up to allow charging when the engine is not running. With no load it pulls less than 0.014 Amps


I've added a new mod for 2019: LED interior lights that are switchable between bright white and red. I am not sponsored by anyone and these Chinese made LED assemblies require some mechanical skills and patience. No instructions are provided! For $66 they are a good buy. You'll get two rear hatch light assemblies, one passenger dome light assembly and one dual LED array assembly for the driver-passenger map lights.

https://cartrimhome.com/Reading-light-replacement-4Runner

Each circuit board has the same count of chip LEDs controlled by a pushbutton: 26 Red and 26 White


All of the LEDs are driven in parallel and this can be seen on the traces on the passenger dome light board. Across each individual LED the typical voltage was: 2.36 volts for Red LEDs and 2.88 volts for White LEDs

The map lights are the only board with two pushbuttons and four sets of LEDs. 

All boards have a small black module which provides constant current to the LEDs. With a 13.85v DC supply voltage typical current consumption for each board was: 360 mA for Red LEDs and 420 mA for White LEDs

A typical filament bulb pulls around 400 mA at 13 volts so you have a lot less light for 5.8 Watts of power consumption when compared to the LEDs

  The map light assembly requires removing the shiny metal reflector for the original filament bulbs. You'll also need to make a foam spacer to set the height of the PCB to roughly 3/4". The two plugs that go to the lamp sockets need to be shortened. 

I modified the plugs to look like this because I did away with the sub-connector and ran the wires straight on to the pins coming out the back of the plug. This lowered the height and allowed the LED board to fit properly.


This is the installed LED circuit board that replaces the two individual filament bulbs used for map lights and this board fits well


 Here it is with the lens covers popped back in.  


You can still toggle each map light lens cover to turn individual arrays on or off. The pushbuttons will function smoothly to select red or white light as long as you are careful with hole size and alignment


Here is the rear passenger dome light with the selector switch poking through the hole I machined in the dome light lens. The lens is a close fit so you have to provide a way for the 
lens to snap back into place.
 
Hatch Light Conversions


If you prefer a more subdued "tacti-cool" red light you could desolder a few chip LEDs to lower the total light output.
It is also interesting to note insects don't see so well in red light. Most insects have only two types of visual pigments .  
One pigment absorbs green and yellow light (550 nm); the other absorbs blue and ultraviolet light (<480 nm).  


July - 2019 A better roof rack!

 The stock Toyota roof top cargo rack is adequate for loads up to 150 pounds total. If you add any sort of type of aftermarket cargo basket you must deduct the weight of that basket from the total. Those big & burly "macho" steel baskets from various companies look great but at 80 to 100 pounds you cannot safely load up the rack full of gear. 

The African Outback all-aluminum rack is a big and strong platform that weighs less than 60 pounds and a versatile system of tie-down points for cargo.


I had an African Outback aluminum rack on the 2005 4Runner and I saved it when that vehicle sold. Now I have finally mounted it on the 2018 4Runner. The original rail system would not work and it took a lot of searching and a bit of risk taking to try out the rail system from the Eeezi-Awn K9 roof rack. I bought the rails and brackets from the fine folks at Equipt Expedition Outfitters out of Salt Lake City, Utah. 


I have a ton of accessories for the A-O rack so it was worth going to the trouble to "recycle" it on the new 4Runner.


I bought a kit to allow me to install a front view camera and at any time be able to view that camera or the rear camera. The front camera is angled downward for more of a ground view than a forward view.


As part of the kit they included a bypass to allow a passenger to use the Toyota Navigation app's UI even while the truck is moving. The kit included a simple toggle switch but I wanted something that looked more factory-ish.

I bought this switch online. 


I modified it internally to operate the way I preferred so as to indicate the modified mode of Navigation's UI.

When the Nav app is in restricted mode the letter "GPS" are illuminated.

When the passenger pushes the button the "GPS" letters are not illuminated and nav addresses can be entered while driving.

I finally was able to organize the mounting and powering of a few things by utilizing a mounting bracket from ICS Fab. It bolts into the bezel surrounding the audio head unit.

Now I have a very secure mount for my new satellite messenger, the temperature display for the fridge and my radar detector. I set the deck up with a small pod that provides four USB power outlets.

Installation was very time consuming because I struggled a bit with fitment. I also tapped into the dash 12 volt power outlet so as to have switched power.


My Expedition Trailer

This is the trailer when I first bought it in 2010 and it had giant tires and rims, no awning, no backup lights and other minor shortcomings that I eventually corrected. 


This trailer is a one-off built by a company that went out of business. Lots of companies out there sell similar designs so mine is not truly unique in size of design. However, I have improved upon the original platform by improving the wiring, correcting mistakes, adding in new features such as a Fiamma awning and powerful LED back-up lights.


One recent project was to replace the two straps that hold down the roof top tent (RTT) cover. They are to help prevent the cover from ballooning up due to pressurized air from the truck's slipstream while at speed. Besides having deteriorated two straps were not enough as the area of the cover over the ladder would balloon up six to ten inches. So I purchased new 2" wide straps and made new retaining plates for the ends.


2019 Update:The black straps came from Strapworks and lasted 5 years. When I ordered replacements I changed to a tan color instead of black to better match the RTT cover.


Lock & Roll Hitch Failure


After the Lock N' Roll hitch failed on the 2013 Maze trip I purchased a Max Coupler hitch. 


On mine the bushing for the bolt has thicker walls and a shoulder that sits against the bottom of the yoke.  It has not had any outright failure issues but the bushing in the yoke is an area of concern due to wear. I am uncertain if the wear is due to metal-to-metal galling, lack of enough lubrication or invasion by dust and grit. 

Here are some pictures of the damaged surfaces of the yoke and the bushing


There is enough play in it now that I had to order a new yoke. I experienced difficulty in communicating with the current OEM company, CU Offroad. I ended up ordering elsewhere. Here is what the new one looks like. Note the changes in the yoke including a grease fitting.


After waiting a week I finally received the new yoke that I ordered. Here are some pictures highlighting the design changes and what I observed about the quality.


For some reason CU Offroad calls this bushing a "Crush Washer" which it is not. The new bushing is now internally threaded to secure it to the bolt. However it is still a very hard steel wearing against the softer steel of the yoke.

Here is where the grease port feeds the grease to the bushing

These tacked on curved rods are meant to temporarily support the poly bushings on the tongue assembly so as to make it easier to align the holes for the hitch pin.


 What;s this bare spot?


Pretty bad paint job.

Build quality is mixed. This gap in the bushing support is annoying. 


The instructions shipped with the unit are completely out of date, failing to mention the bushing is now threaded and how to correctly disassemble the unit.


In 2015 I set up both the truck and trailer with new Duratrac tires. It  allows emergency one-for-one swaps of the trailer's tires for the truck's tires.
So why run aggressive tires on a trailer? The common answer is to have the same sized tires and rims as the tow vehicle such that the trailer's tires serve as emergency spares. In the beginning I ran all weather tires on the trailer because I wanted to minimize rolling resistance and any negative impacts to the 4Runners MPG. On a recent trip to the White Rim Trail in Canyonlands NP we had wet enough weather that the old dirt roads quickly became layered in mud. While towing the trailer uphill I could see the tires turn into huge donuts of mud that was not being shed and the tires soon lost all traction whether moving forward or while applying the brakes.


I believe that the more aggressive tires will shed mud more easily and eliminate this issue but the drought in California is not providing any usable test conditions. 
Fully loaded vehicle and trailer deployed in a remote desert canyon


I added a small modification to the tent to help with very windy weather. I've noticed that high winds can push up the folding section where the ladder attaches. At each of two corners of the platform I've bolted in folding D-Rings for attaching lines to ground stakes or other anchors..

Here is a first look at the trailer's new spare tire carrier. It mounts into the hitch receiver at the back of the trailer and is hinged so as to drop the tire down before the tailgate can be opened.

Here is the finished tire carrier in use while I was out on some adventures. It was really nice to have the option to bring another full-sized spare. If I ever have multiple flats on the 4Runner I can remove the trailer's tires and leave the trailer behind for later recovery.


I've wanted to have a bottle opener mounted to the exterior of the trailer for those wild nights where I drink beer after beer and can't be trusted to not lose a handheld bottle opener.  (I jest!)  I just so happened to have completed a 10 mile race today and received this nifty finisher's "medal" that can be a wall mountable opener! Now I have to figure what spot of honor this keepsake will occupy on the outside of the trailer.


Trailer Batteries & Solar Charging

In the Trailer's nose box is a panel that I built to provide an organized way to attach and fuse all of the electrical circuits, from the electric brakes to the solar panel. The panel includes terminal strips, breakers for the high current paths, fuses for low current paths, solar charge controller and the AC powered battery charger used for when the trailer is parked..


 Here is the nose box with two batteries and panel installed.


I made an insulating cover to protect the battery terminals and it uses the battery hold down screws to fasten it securely.


This is the Kyocera 60 watt solar panel that can be securely stored on slides between the roof top tent and the top of the trailer. The panel has a cable lock to protect it from casual theft.


This is how the panel slides out before it is released from the slides.


I resurrected and finished a trailer upgrade from 2011 that has somehow been passed over time and again. The original tailgate on the trailer was designed without a flat surface to pull cargo across. It was a pain to always have cargo boxes bump across and catch on the tailgate frame. A flat surface would also be great to act as a table for a stove, pelican box  or other activities.


I was given a new piece of aluminum diamondplate by a member of the Expedition Portal who I met at the 2011 March Mojave Rendevous. All I needed was to cut it to size, provide slots for the cable anchors and screw it down to the tailgate.

I never had access to a sheet metal shear so I decided "good enough" would have to do to get this project completed. I bought some jigsaw blades for cutting fine metal and fired up my Father's old Black & Decker jigsaw. Lubricating the cuts with aluminum machining oil helped to ensure smooth quick cuts. 

I had to provide two slotted holes for the tailgate cable anchors to poke through. I drilled a series of holes and filed them out by hand and obtained a reasonably good fit.

First test fit to the tailgate! Note the trailer's curved gussets at the bottom corners. I had to trim the Aluminum diamond plate to match.

Here it is! When I re-loaded the trailer's cargo boxes I really enjoyed easily sliding each box across the upgraded tailgate.


Suspension Refresh

The trailer has served me well for almost ten years and it deserves a little love now and then. The red polyurethane bushings on the leaf springs looked faded and cracked, the shackle plates had never been satisfactory and the shackle hanger mounted on the frame was a bit of a mystery as to origins. 


Another issue was how the lowest spring in the pack could rotate slightly and damage the outer tube of the nearby shock absorber. I felt the worn bushings and swaying movement of the hangers might have been the root cause of the spring movement.

The leaf springs are ProComp Jeep YJ springs #51323 and the red poly bushings are 69261. So it was easy to order new bushings which are 1.5" in diameter.

 New versus old bushing:

I also ordered some steel U-clamps to help with the spring leaf movement.


The bushing for the shackle mount on the frame may well be based on one for a Jeep CJ or early YJ as the bushing diameter is 1". The worn bushings are polyurethane but I have not yet been able to find a source. For now I have installed some stock Jeep CJ rubber bushings.

Here is the frame mount

Note the two bolt holes that likely match those on a Jeep's frame


I ordered a shackle kit that was meant to add some lift and shortened the plates to match the bolt spacing of the trailer's original plates. A stock Jeep rear shackle was 3" and mine was just shy of 4" for bolt spacing.


Final results are a great improvement

The spring clamps were easy to install and if they prove to be overly restrictive I can easily remove them .


My previous 4Runner

In 2018 I sold my 2005 4Runner and before selling I stripped out all of my modifications and, re-installed the original Toyota parts. It was at 239,000 miles and I felt that a new vehicle would be a good choice because of my frequent solo trips. The 2005 4Runner was a very faithful and reliable friend, sharing many adventures.

This is a last picture of it before it left with a new owner.


I've chosen a slightly larger than OEM size tire: LT265/75/R16 load range C. Light truck tires are much better than P-metric and this size provides 1/2" more lift to the vehicle when new. The tougher and taller sidewalls are an advantage when airing down. Up until now I have run Bridgestone Revo all-season tires but I recently switched to a tire that best fits between the categories of All-Terrain (A/T) and Mud Terrain (M/T). The center lugs are like an A/T but the outer lugs are designed like an M/T. They are made by Goodyear and are the Duratrac model. So far they are good on pavement with only slightly increased noise and on a recent trip in Utah they were excellent in rocks and sand, even while towing my trailer.